
Cabinet painting made easy
Transforming your old, faded cabinets into a cost effective solution that's beautiful!
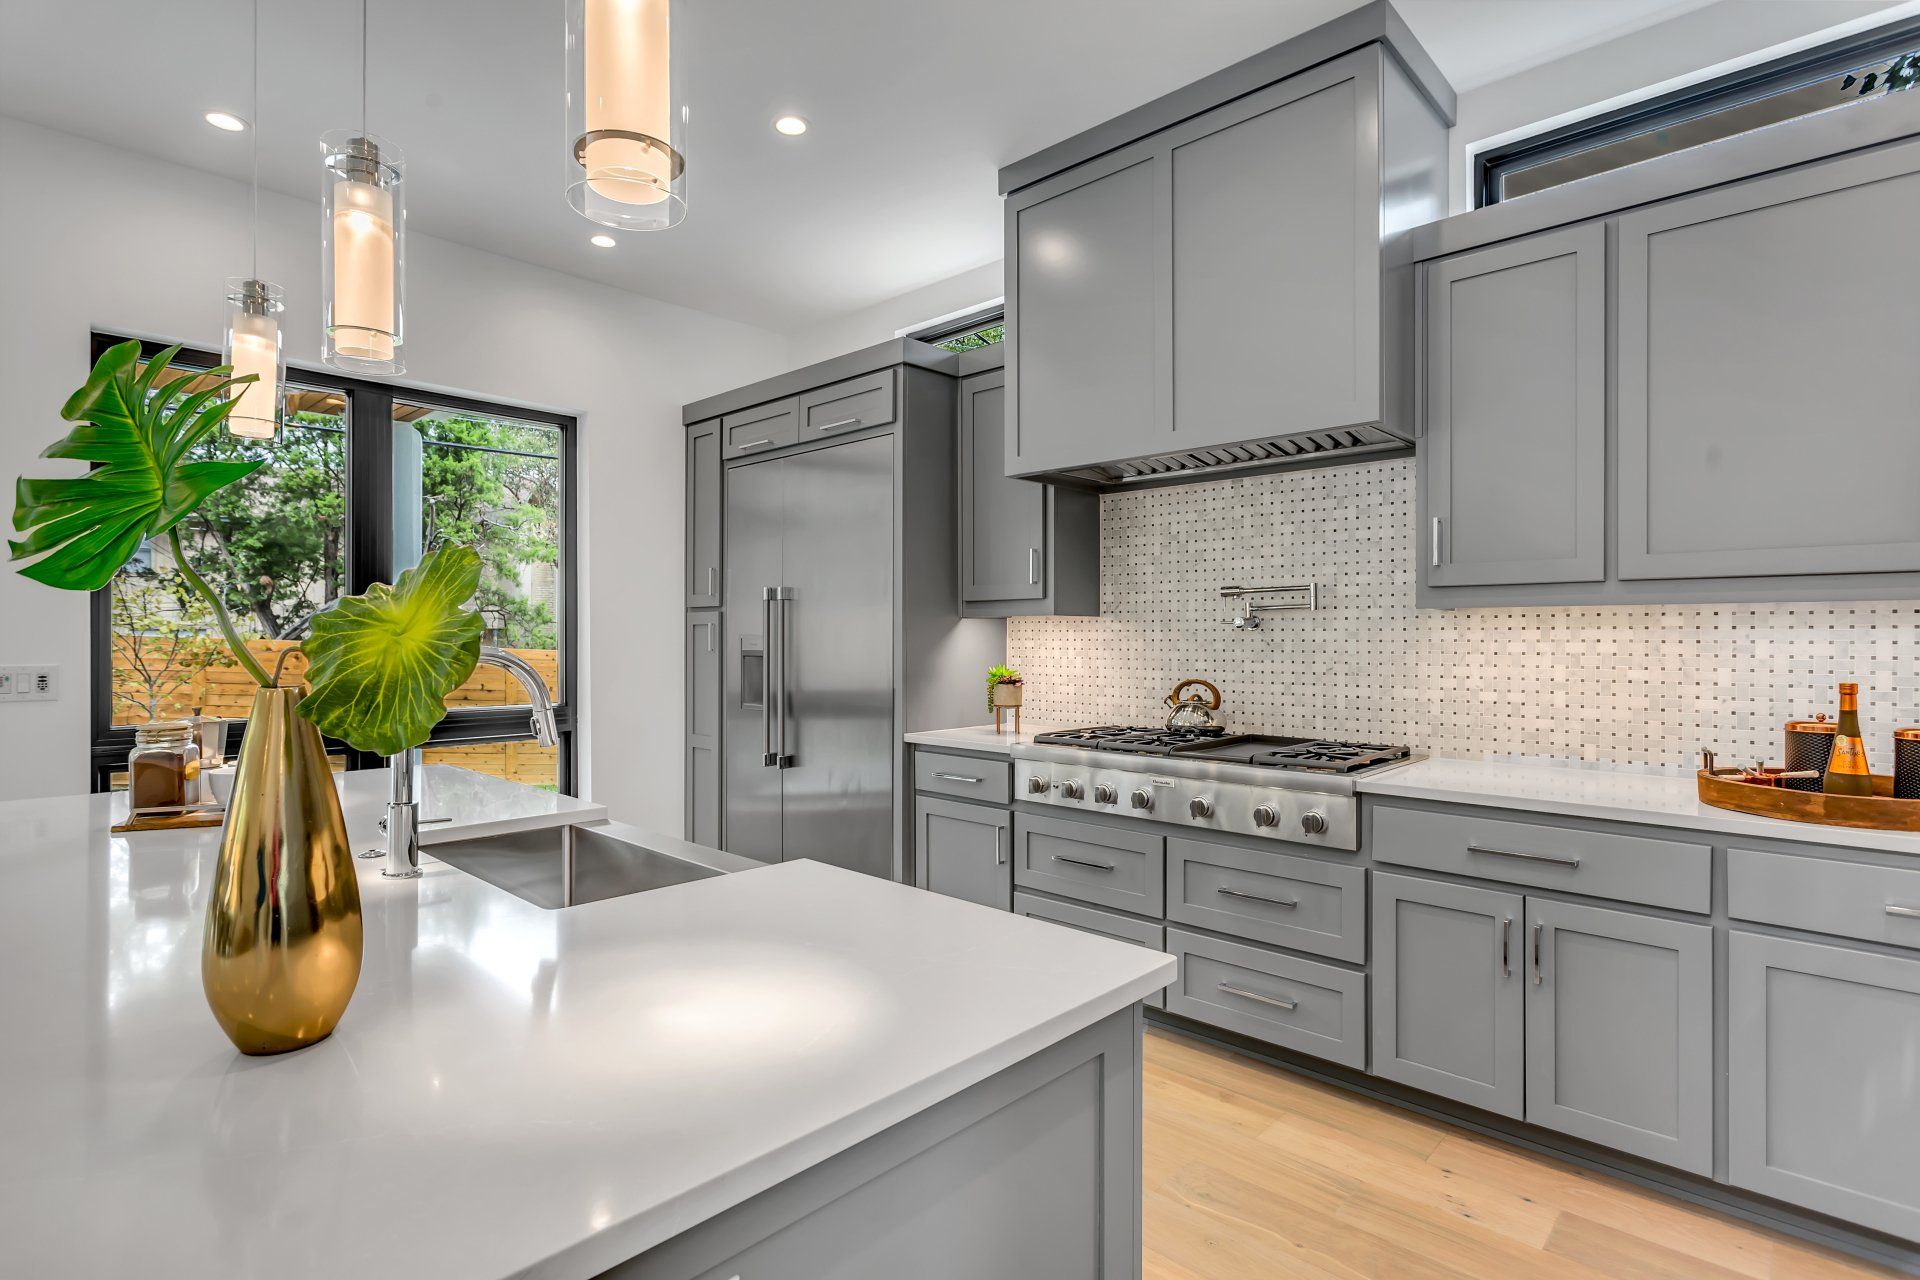
Cabinet painting is a great solution for homeowners and businesses alike. Many people shy away from painting and assume they cannot do the work themselves, but with proper tools and preparation it can be an easy task. The main benefit of having cabinets painted has to do with how they look. Not only will your cabinets look like new again, but if you're tired of your current color scheme then simply changing the color of the paint on each cabinet door will give you a whole new look that's fresh and up to date. It's also very cost effective as well as durable because there is no sanding or stripping involved in cabinet painting.
Cleaning your cabinets before beginning any work is essential so start by removing all items from inside your kitchen or bathroom cabinets. This includes items from inside the cabinets as well as the doors themselves. It is best to use a vacuum cleaner to remove dust and dirt particles from inside each cabinet before beginning work on any of your cabinets. Once you have finished vacuuming, wipe down all surfaces with a damp cloth or sponge in order to ensure that there's no residual dust or dirt on any surface areas. After this, it is time to tape off the cabinet doors so they will remain dust free during painting. When taping off each door place masking tape directly onto drywall surrounding the space that will be covered by each door before applying another layer of tape onto the first layer using painter's tape which won't leave behind any sticky residue when removed later on. You can also purchase high quality masking paper or plastic for this part of the process which is usually the best option if you're looking to get a clean and professional look.
Once all surfaces and doors have been taped off it's time to apply your first layer of paint. When painting cabinets always start from the top and work your way down, so begin by placing a ladder in front of each cabinet that needs some attention before beginning to paint. If you need extra height when painting higher areas of cabinets add on an additional step-stool onto your ladder while being sure not to carry excess weight while climbing up and down each ladder. Placing a small cup just below the nozzle on your paint can will catch any drips or spills that take place which will help keep your work space clean and safe. Use a high quality paintbrush that you don't mind throwing away to start applying paint onto each cabinet door before using a roller or sprayer to apply the rest. After all doors have been painted remove the tape while the paint is still fresh in order to prevent any damage or peeling later on. If using painters paper or plastic take care when removing it from surfaces by carefully pulling off starting with one corner at a time before completely removing it from surrounding areas. The final step after painting hinges, knobs and other small parts of cabinets is to make sure each surface has dried thoroughly before replacing items like dishes, silverware, spices or anything that would get ruined if they came into contact with fresh paint.
Finishing up cabinet painting includes doing a quality check to ensure each surface looks great before moving onto the next step of staining and then sealing off each door. You can use a variety of colors for this part, but if you're going for a uniform look simply choose one color that matches your taste best. When applying stain to cabinets be sure to wear protective eyewear and gloves as well as long sleeves in order to protect yourself from any potential splatters or stains while working on surfaces. Use a good quality brush in order to avoid leaving behind excess brush marks when staining joined edges or corners which will make your work look sloppy and unprofessional. Once finished with all parts of the cabinets it is time to apply a top-coat of polyurethane to seal off each door. It is best to apply a generous amount of polyurethane in order to get a nice smooth finish while also ensuring that your cabinets will be waterproof and easy to clean. Using a brush or roller, simply follow the same process you did when applying paint in order to make sure everything looks great before moving onto the final step of installing all doors back onto their original hinges where they belong.
Installing cabinet doors on newly painted surfaces is relatively easy as long as you have the correct tools for the job. In most cases it's best to place screws directly into pre-drilled holes which will give each door a more solid hold on its hinges rather than using wood glue which can take days to dry. After you've installed each door allow everything plenty of time to dry before using them around your home or business.
All in all cabinet painting is a great way for businesses and homeowners to improve the overall look of their kitchen, bathroom or any other space which needs some new life added to it. With so many hues and tones available there's no reason why you shouldn't invest in this simple process that can transform even the darkest corner into something worth admiring.
For more information on how to transform your cabinet doors feel free to contact one of our dedicated team members here at Windsor Painting Services. We offer full painting services for all types of applications throughout Windsor and we would be more than happy to help you with your next painting project!
You might also like

Contact Us!